

Netball
Chest Pass In Netball
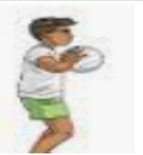
Making A Chest Pass
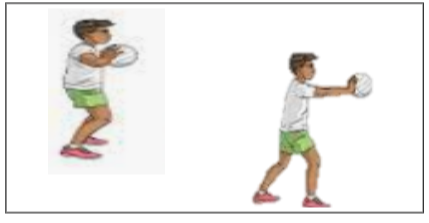
- Grip
- Put your fingers on each side of the ball with your thumb behind the ball and your fingers spread in “W” formation.
- The ball should be at the chest level.
- Your elbow should be pointing out wards.

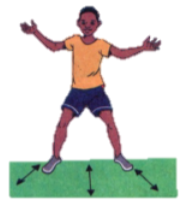
- Stance
- Stand with your feet comfortably should- width apart facing the target.

- Stand with your feet comfortably should- width apart facing the target.
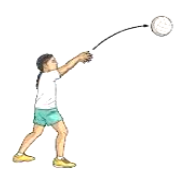
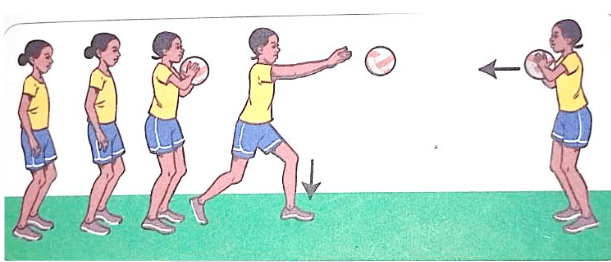
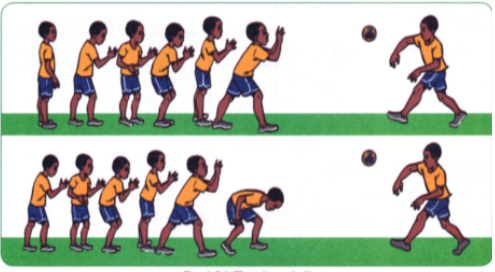
- Execution of the pass
- Extend the arms fully towards the direction of the pass
- Flick the wrist and the finger as you release the ball
- Step in the direction of the pass for a follow through
- Complete the action with the palm facing outwards and fingers spread.
Pupil’s activities Pg. 3.

Drill: Line And Pass
- Resources needed
- An open area
- Age- appropriate netball or improvised ball
- Field markers or chalk.
Making line and pass drill
- Make a line behind one another facing the team leader at a point 5m away from the learners passing the ball.
- The leading learner passes the ball to the leader and joins the line from the back.
- The team leader passes the ball to the next waiting the learner using the chest pass.
- Repeat until every leaner gets a chance to perform a chest pass.

Execution of Pass.
- In pairs stand 3m apart facing the goal
- Pass the ball to your teammate using a chest pass
- After passing the ball to your teammate, jog to the point ahead to receive the ball
- Repeat the activity until you reach the goal end of the court .
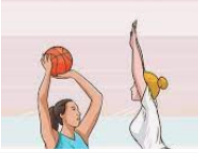
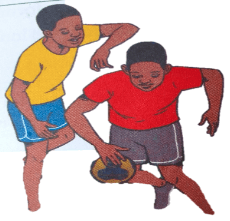
Dodging And Marking In Netball
Dodging – is a technique use to counter the marking attempt.
- It is applied by members of the team in control of the ball.
- The player being marked makes attempt to get free from the marker and move into space to receive pass. It may involve changing pace and use of deceptive body action to put the marking player of balance.
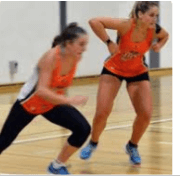
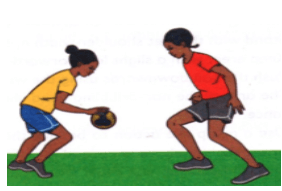
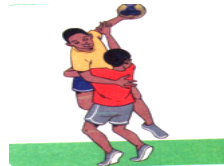
Marking
Body Movement When Marking An Opponent
- Standing in front of the player being marked.
- Standing beside the player being marked.
- Raising hands up or to the side to reach the path of the ball.
- The hands should be on the side of the body.
- React quickly when the opponent being marked.
- Make any movement, move in the same direction using short steps, and shuffle sideways without crossing the feet.
- Focus on both the ball and player being marked.
- Marking a player with the ball.
- Take a position in front of the opponent 0.9m apart
- Establish a basic stance with feet not more than should –width apart
- Keep the body upright and eyes on the ball
- Hands should be straight up and moving with the position of the ball.

- Marking a player without a ball
- Stand close to you opponent.
- Establish a basic stance with feet not more than shoulder- width apart
- Knees should be slightly bend and body weight on the balls of the feet for better response and ease in change of direction.
- Keep eyes focused on the player with the ball.
- Anticipate the movement of your opponent and move appropriately.

- Marking in space
Sometimes the ball is passed in space and not directly to the player.

Body Movement To Use When Dodging An Opponent
- Using bending or leaning movement with the body trunk to left or right or left
- Sprinting off from the marker
- Sprinting and stopping
- Extending the left or right arms away from the opponent
- Changing the speed
- Remain still and move at the same speed with our marker
- Suddenly sprint or slow down at once to displace your marker
- Receive the ball and land in readiness to attach

- Single feign
Feign is a situation when one pretends to be affected by feeling in a netball game. It mainly happens when attacking an opponent with a ball in a netball court.- Establish a basic dodging stance in front of you marker with the feet not more than shoulder- width apart and knees slightly bent and weight on the balls of the feet.
- Pretend to move to the left and then move to the right to receive the ball.
- Double feign
- Stand in front of the marker
- Establish basic dodging stance with feet not more that should –width apart, knees slightly bent and weight on the balls of the feet.
- Pretend to move to the left then right and finally move to the left to receive the ball.
Sprint into a space
- Remain close to your marker
- Stand with feet shoulder – width apart, knees slightly bent and weight on the balls of the feet.
- Make an unexpected sprint into space and receive the ball.
Drills In Marking
- in mirror drill dodging and marking technique the defender stands a slight distance in front of the attacker, there defender therefore respond to the movement made by attacker.
- If the attacker moves to the right, the defender mirrors the same movement and moves to the right.
Four sphere drill
- Here five players draw four spheres in a rectangular formation and another circle at the Centre.
- The four circles are then numbered 1,2,3,4
- The player practicing the marking starts at the Centre of the circle.
- When the teachers call out the sphere number, the player at the Centre moves quickly to that sphere to mark and then move back to the Centre sphere.
Four sphere variation drill
- player take position 1,2,3,4
- the pass is from player 1 to player 1
- After a pass is made the player at the Centre sprint to mark the player receiving the ball then moves back to the Centre.
- Repeat the drill as the ball is passed around the circle.
- Keep substituting the Centre player to give others an opportunity to practices
- After marking, the learner goes back to the Centre circle. This is repeated until all learners get a chance to practice marking.

Drills For Dodging
- The dodging triad
- Place three cones to form an isosceles triangle with a height of 5m and a base of 4m.
- Two of you stand at the centre of the baseline and behind one behind the other. The learner with the ball stands at the furthest tip of the triangle.
- The leading learner at the base acts as the defender while the trailing learner acts as the attacker.
- The trailing learner performs a single feint to the left and dashes to receive the ball at the right edge of the triangular formation.
- The trailing learner performs a double feint to receive the ball at the right edge of the triangular formation.
- The trailing learner sprints to the center of the formation and receives the ball
- Learners keep changing roles until they all practice the single feint, double feign and sprint dodge.
Activity 5 page. 10
Footwork In Netball
There are two landing techniques in netball
- Double foot landing
- Single foot landing
- Making Double foot landing
- Start with a short run and take – off. Make a short run and spring off the floor with both feet into a jump.
- When making a double foot landing a player should :
- Maintain an upright posture and keep the arms out for balance
- Land with the feet shoulder- width apart and body weight equally distributed on both feet for balance
- Land with knees slightly bent and knees, hips and ankles to cushion the landing impact.

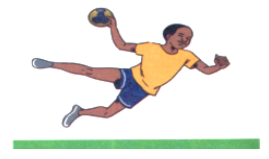
- Making single foot landing
- Take-off to make the body airborne. Make a short run and spring off the floor with one foot in to a jump
- If you take off on the right; land on your left foot.
- If you take off on the left; land on your right foot.
- Contact the floor with the balls of the foot first, with the knees, ankles and hips slightly bent.
- Place the other foot on the ground quickly to absorb the impact and help with balance
- Maintain a low body position for stability and safety.

- Pivoting
Pivoting – is the act of turning with one foot on the ground while the other foot makes repeated short steps.
Pivoting;- Helps the player develop balance after landing
- Helps the player turn away from the defender who may be marking
- Helps in locating teammates who may be well – positioned to receive the pass.

Drills In Netball
Drill 1; the beeline
- Form groups of five and stand in a line behind one another.
- Ensure you are well spaced in the line
- The leading learner in the line to take off from both feet and land on both
- Other learners to follow the leaders performing a double foot take- off and a double foot landing
Drill 2; the beeline with the ball
- Form groups of five stand in a line behind one another
- Ensure you are well spaced in the line
- Let the leader of the group and the leading learner in the line to make a short run, the ball up, jump, catch the ball and make a double foot landing.
- Other learners to follow and imitate the leaders` actions.
Drill 3; the sickle
- Form group of five members to adapt sickle formation and their leader to take a position in front and at the Centre of the sickle.
- The leader passes the ball to teammates in the arc.
- The teammates to catch the ball and make a single foot landing
Drill 4; the Y drill
- Learners to adapt a Y formation
- The leader of the group to be at the Centre of the Y formation and in possession of the ball
- The leading learner in the line sprints to right or to the left to receive the ball from the leader, make a single foot landing and then pivot.
Handball
Passes And Reception In Handball
Passing
- Speeding up the game
- Creating scoring chances
- Breaking tight defense
- Releasing pressure during play
- Expressing creative abilities during play
Qualities of a good pass
- Accurate so that a player has no problem catching the ball.
- Fast and timely to exploit the play chance promptly.
- Useful – a pass should be directed to that player whose position may disadvantage the opponent.
Types of passes
There are three types of passes, namely;
- Jump pass
- Side pass
- Flick pass
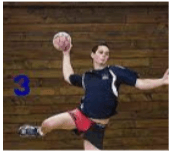
- Jump pass
A jump pass is where a player leaps in to the air and throws the ball to a teammate before landing.
It is completed at the peak of the jump with a player in control releasing the ball to the teammate
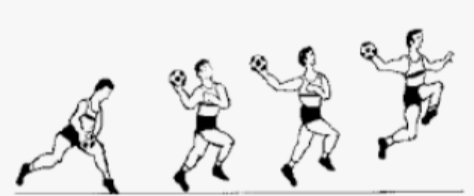
Stages of execution in jump pass- Preparation
- Take off from the ground either on a single or double foot.
- Bring the passing arm high and back above the level of the head
- Bring the non- passing arm slightly in front of your body
- Keep shoulders high and head up
- Execution
- As you bring the passing arm forward to release the ball, pull the non-passing arm backwards at hip level.
- Release the ball to your teammate with a follow through and wrist action.

- Preparation
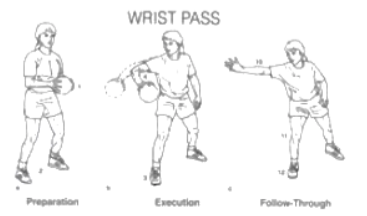
- Side pass
A side pass is also known as wrist passes and is the most common way of passing the ball across the width of the court. This movement is called ball circulation.
Stages of execution in side pass- Preparation
- Stand with feet slightly closer together than shoulder-width apart from the target ,the receiver should be on your right or left side
- Hold the ball on the passing hand with palm facing down
- If the pass is to be made at the right side, hold the ball with the right hand , if the pass is to be made on the left side, hold the ball with the left hand
- Execution
- swing the passing arm across the body from left to right when passing towards the right direction
- release the ball with full extension of the arm with a wrist action
- step sideways towards the direction of the pass for a follow- through

- Preparation
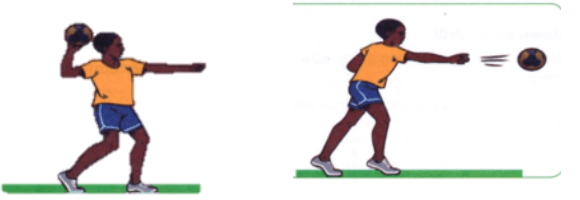
- Flick pass
A flick pass is an action made using the passing arm which quickly propels the ball forward. The release action of the ball is terminated with a forward wrist action.
Stages of execution- Preparation
- Take a staggered stance with the leg of the non- passing arm leading.
- Hold the ball with one hand in an open palm, fingers well spread behind it at shoulder level
- The non-passing arm should be extended outwards for balance
- Eyes should be focused on the target
- Execution
- Step with trailing foot forward
- Push the ball forward towards the receiver
- Release the ball by flexing the wrist and the fingers forward for a follow- through. This generates power to propel the ball and give it directions.
- Preparation
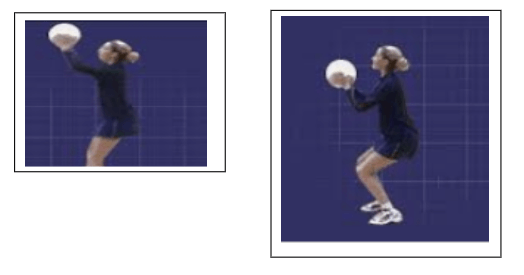
Reception
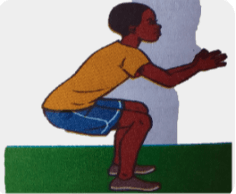
- Preparation
- Stand on the balls of your feet shoulder-width apart facing the direction of the ball.
- Extend your hands towards the ball
- Move forward to meet the oncoming ball
- Keep your arms pointed towards the ball
- Your hands should form a tunnel shape of a W formation ready to receive the ball.
 Preparation to catch
- Termination
- On contact with the ball, wrap the fingers around it and bend the elbows bring the ball towards the chest.
- Ensure the thumbs are behind the ball and get in to a ready position for your next action.

 Preparation to catch
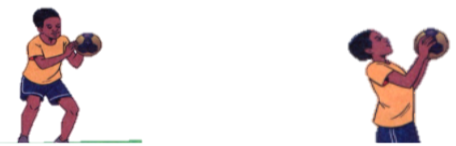
Drills In Hand Balls
- Player to form two lines
- The leaders pass the ball using a flick pass
- After making the pass, the leader joins the line from behind
- Ensure everyone get a chance to pass the ball
Side pass drills
Drill 1: side passing
- In groups of four, stand three meters apart in a semi-circle
- The player with the ball to be at the extreme end
- Pass the ball from right to left without skipping any player
- When the ball reaches the end, pass the ball back to the left
Drill 3: down court drill
- In pairs, stand 3 m apart facing the goal, walk down the court passing the ball using the side pass.
- Change the pace to a jog and continue passing the ball each other up and down the court
Pupils’ activity Pg. 22
Footwork In Handball
Principles of good landing
- Landing on the balls of the feet
- Knees should be slightly bent to cushion the shock on the impact of landing
- This is also referred to as knee- deep landing.

Landing
Stepping progression skills in handball
- the players are in circular formation passing and catching the ball
- Catch the ball from a side pass land on both feet and take three steps and then pass it to the next player using a side pass.
Drill 4:
- the players are in a triangular formation passing and catching the ball
- Catch the ball from a flick pass and land on both feet, take three steps and then pass the ball using a flick pass.
Drill 5:
- in a group six form a line formation
- Practice catching the ball and landing on both feet. Use a jump pass while passing.
Dodging And Marking In Handball
- Observant – the marking player needs to pay attention to the attackers who are likely to gain possession of the ball and drive forward
- Good positioning – ability to position himself or herself appropriately between the attacking player and their defending goal
- Quick time reaction – this helps the marking player respond to unexpected tactical actions by the attacking players.
- Resilience and persistence – the marking player should never give up on playing a defensive role.
- Communication – good marking is a product of communicating with teammates to develop a suitable plan or approach to counter the playing actions of the attacking teams
- Courageous – a good marker should be courageous to withstand non-avoidable contacts that may occur during one on one tackling situations
- Peripheral vision – a player who is marking needs to see what is happening around him or her and not just focuses on the player being marked alone.

Body Feign In Handball
- Single feign dodge
- Double feign dodge
- In group of five players, form two lines facing one another 5m apart
- Players approach each other
- In closing to one another, each of them performs a single feign to the opposite side.
Leaning point for double feign dodge
- Take a position at least 5m in front of an opponent
- Make a short run and break it with a double foot landing referred to as a zero step
- Lean towards either the right or left and repeat the feigning.
- Complete the original intended love.
Drill 1: Pair feign dodge
- In pairs without the ball, stand facing each other
- One of you to practice the double feign dodge
- Repeat three times and switch roles
Drill 2: Quinque drill
- In groups of five, place a cone in the court and make a line facing the cone
- Sprint to the cone and stop on zero steps, feign to the right, then left and then move to the right to receive the ball.
Dribbling In Handball
- High dribble
- Low dribble
- Stand with the feet shoulder-width apart
- The knees should be slightly bent and body weight on the balls of the feet
- Push the ball downwards using the wrist and the fingers for better control
- The arm of the non- dribbling hand should be extended outwards from the body for balance
- Use a pump like action to bounce the ball repeatedly with the enough force so that it bounces slightly above knee level. This constitutes a low level.
- Control the ball by flexing the wrist and the fingers
- Bounce the ball below knee level for a low dribble
- Keep the head up and avoid looking at the ball
Learning points for high dribble
- Stand with the feet shoulder- width apart
- Keep erect with a slight lean forward and body weight on the balls of the feet
- Push the ball downwards using the wrist and the fingers for better control
- The arm of the non-dribbling hand should be extended outwards from the body for balance
- Use a pump like action to bounce the ball repeatedly with enough force so that it bounces slightly above knee level for a high. This constitutes a high dribble.
- Keep the head up and avoid looking at the ball.
Drills Of Dribbling In Handball
- Take three steps, make one dribble and take three more steps.
- Increase the number of dribbles between three- step sections
- At the end of the sequence, make a shot or a pass
Drill 2: Walking drill
- Walk across the court with a ball five times making a high dribble
- Repeat the drill using a low dribble
Drill 3: The cone drill
- Place seven cones in a line 1.5m apart
- In groups of five, practice zigzag movement pattern in and out of the cones one at a time
- Start with a low dribble and later a high dribble
- As you perfect the dribble, make more challenging by shortening the distance between the cones
Drill 4:The court drill
- Individually dribble a ball along a court marking using high and low dribbles. Use a movement pattern of three high dribble and three low dribbles.
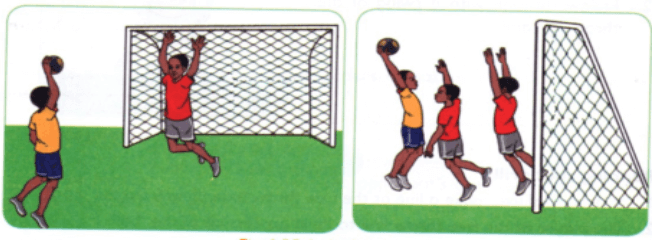
Shooting In Handball
- Never aim to hit or injure the goalkeeper with the ball.
- Take turn and shoot one player at a time
- Warm up adequately before starting the shooting activity
- Adhere to the instructions given by the instructor
- Be conscious of the nature of the floor or the ground while making a falling or a dive shot

Types of shots in handball include:
- Jump shot
- Dive shot
- Running shot
- Falling shot
- Lob shot
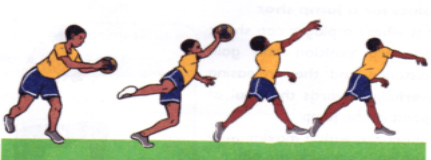
Demonstrating jump shot
- Make a shot run with a maximum of three steps while gripping the ball
- Make a single foot take off in the last step for an upward thrust. Bend the other leg at the knee for more force upward.


Demonstration for a running short
- Make two or three steps towards the attacking goal end then make a shot at the goal
- Follow through with a swing of the throwing hand

Demonstrating a dive shot
- Take a position outside the 6m line facing the attacking goal.
- Take off with both feet high and the head fast towards the goal area.
- Release the ball while airborne and land in the goal area with the body low.
- Convert your landing into a roll for safety.

Learning points for falling shot
- Take a position outside the 6m line facing the goal.
- With the feet firm on the floor outside the goal area, fall towards the goal area .
- Release the ball before contacting the goal area with the hands or any other part of the .body
Learning points for lob shot
- Take a position outside the 6m line
- Face the goalkeeper who may have moved closer to you in defense
- Throw the ball in a curved path over the goalkeeper
- Flick the wrist to give the ball direction and accuracy.

Drills For Shooting In Handball
- In groups of five make a line facing the goal with the leader at the free throw line
- The leader makes a pass to the first player in the line
- The player makes 3 steps and then a jump shot
- After making a jump shot the player joins the line from the back
- Repeat the activity3 times then change to practice a running shot
Drill 2: Drill and shoot
- In a group of four players, make a line at the substitution zone facing the goal where you intend to shoot
- Use a high dribble to move towards the goal area
- On reaching the free throw line, catch the ball and make a jump shot
- Retrieve the ball and run along the goal line to the corner and then along the sideline to join your teammates
- After three attempts change and practice a running shot
Drill 3: Corner drill
- In a group of five, make a line at the corner of the court
- The leader to stand at a point within the court
- The first player in the line to run along the goal area line
- When at a comfortable position, catch the ball from the group leader and make a dive short.
Pupils activities Pg. 35.
Download Games - Grade 7 Physical Education & Sports Revision Notes.
Tap Here to Download for 30/-
Get on WhatsApp for 30/-
Why download?
- ✔ To read offline at any time.
- ✔ To Print at your convenience
- ✔ Share Easily with Friends / Students