
Patterns and games
Simple programming using Scratch.
- The scratch language has similarities to children’s building brick toys.
- It uses a simple structure of graphical bricks or blocks of computer code.
- They snap and interlock together to build and control sound, music and images.
Main parts of Scratch
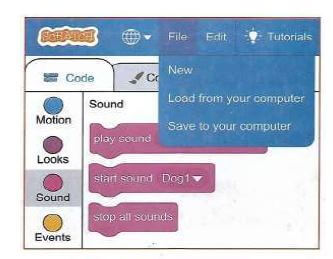
- Menus - this part contains the file menu used to save or load your projects.
- Main tabs - this part helps a user switch between different activities, such as coding, drawing or adding sound.
- Blocks categories (Blocks Palette) -this part contains a coloured set of code blocks that are used to program the sprite and give actions to it.
- Code blocks -these are blocks that are shaped differently and are used to create code in scratch. The blocks connect to each other vertically like a jigsaw.
- Coding area (sprite area) - this is the place where you create a code (script) for a sprite to do a specific action. You drag and drop the code here and snap them together to create your programme.
- Start and stop - you click the green flag to start your code or the stop sign to stop the code.
- The stage: this is the main working area where the sprite moves and performs as per the given code of instruction.
- Sprite - this is a small graphic character that performs actions, such as moving around in the stage.
- Sprite info - this part of scratch shows information about each sprite, such as how big it is.
- Sprite list - this part displays all the sprites in your project.
- The selected sprite has a blue border around it.
- Choose a backdrop - this part is used for adding a new background to your project.
- Choose a sprite - this part is used for adding a new sprite to your project.
- Tutorials - this part contains some help videos. Click the white X to close it.
Sprites
- The sprite info is where scratch displays icons of the sprites that are being used in the current project.
- A sprite is an animated character or object in your program.
- Sprites can move around, be active or be objects that stay still. These actions are determined by the scripts that your create.scripts tell the sprites what to do and what actions to perform.
- The cat sprite called Sprite1 always appears by default when you create a new project.
- To add a new sprite to a scratch project, you use the icon in the button right-corner of the pane.

- Clicking this button allows you to choose from a library of already existing sprites offered for free on the scratch program.
- Moving the mouse over this reveals more options, as shown

- The options include the following
- Upload sprite
 - this button allows you to upload a sprite from your computer.
 - Surprise
 - this button randomly selects a sprite from the scratch library and inserts it into your current project.
 - Paint
 - this paint brush button creates a blank sprite with an empty costume.
 - Choose a sprite
 - this button allows you to choose a sprite from the library.
Creating animation using scratch.
- Start the scratch 3.0 from your desktop by clicking the icon below.
- At the moment we only have one sprite, a cat named scratchy labelled sprite1.

- By placing blocks in the coding area, we give instructions to the sprite.
- first , go to the blocks Category section located at the lefthand side of the scratch interface which contains thematic folders of blocks of code such as the following:
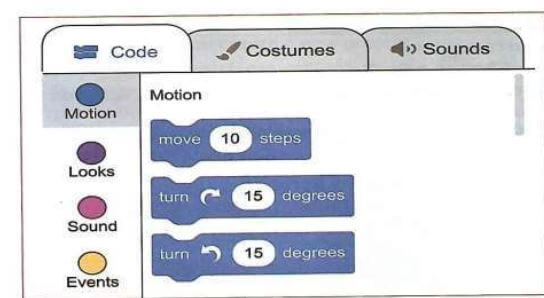
- Motion - these blocks of code control the movement of the sprite
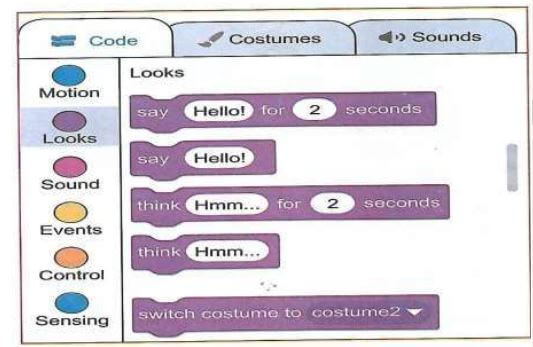
- Looks - these blocks of code change the appearance of a sprite.
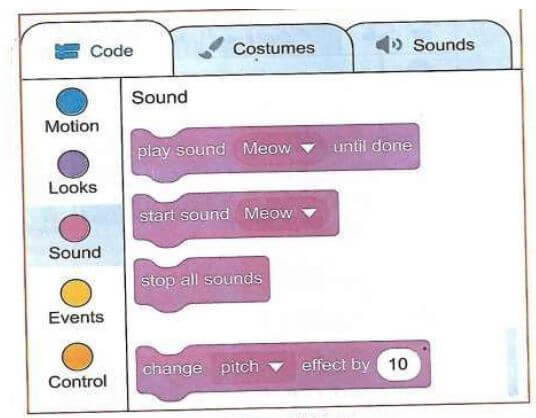
- Sound - these blocks of code add and control sound in your scratch project.
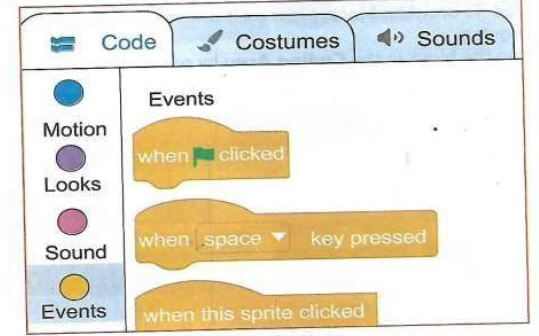
- Events - these blocks of code control when and how the scripts or codes are activated.
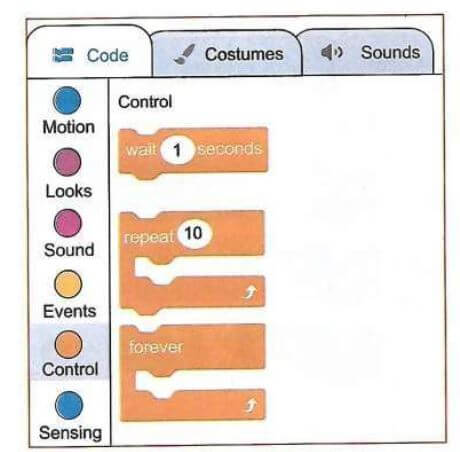
- Control - these blocks of code control how the scripts or codes run.
- Motion - these blocks of code control the movement of the sprite
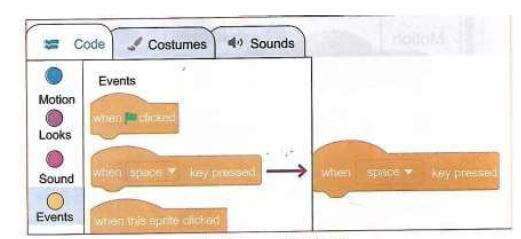
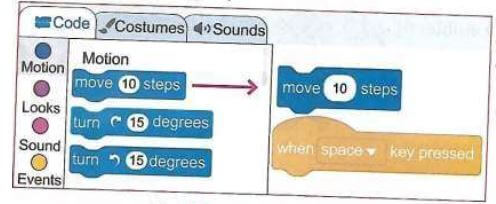
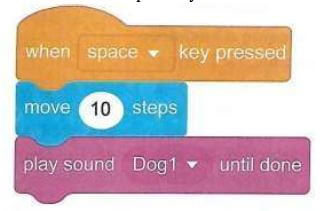
- Now let us make a scratchy run. On the main tabs, click on the events from the blocks categories. Select when the space key pressed block and drag it from the code blocks to the coding area. To drag the block, press on it and hold the space key while dragging.
- Drop the block in the coding area by releasing the mouse button as shown below
- Next, switch from events to motion in the blocks categories. Select move 10 steps block and drag it from the code blocks to the coding area
- Position the block under the events block by pressing the space key.
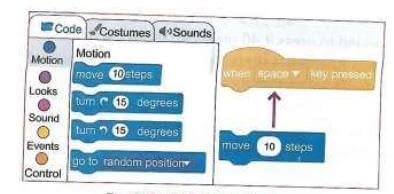
- Release the mouse and the motion block will attach and fix itself under the events block.
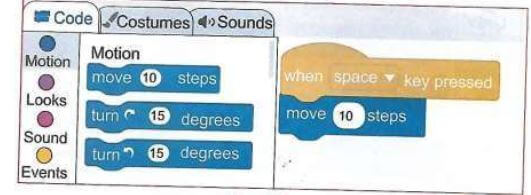
- You have managed to create your first code. Press the space key and watch how scratchy moves. If you keep pressing the space key, scratchy will go to the edge of the stage. The tail will still be visible
- To bring scratchy back, press on its tail, and drag the cat back to the center of the stage. You can press the space key again to move scratchy to the right. Drag it once more to the left side of the stage.
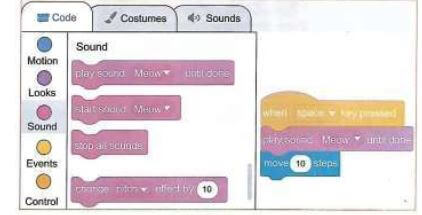
- Next, give sound to the source code. Make the scratchy Meow. Switch from motion to sound in the blocks categories.
- Select play sound Meow until done block and drag it from the code blocks to the coding area.

- Fix it under the motion block. Scratchy is now moving and meowing when you press the space key.
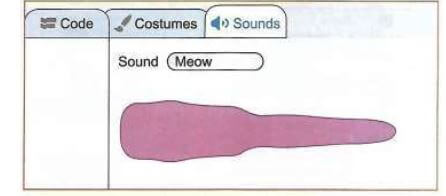
- If scratchy meows too loudly, adjust the volume by going to the main tabs, then clicking on sounds tab. Then reduce the volume by continuously clicking on the softer sound icon.
- If you tire with meowing, you may add new sounds. Let us make scratchy bark. Go to main tabs, click sounds tab. Click on the choose a sound icon. It will open the sound library. This contains different types of sounds. Select animal.
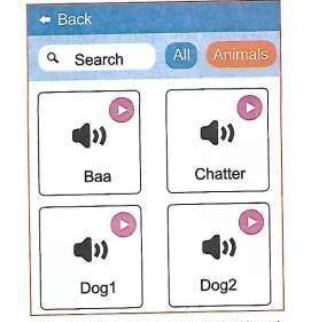
- Click on the Dog 1 sound. Now, we can use two different sounds for scratchy. Go to the code tab, then the code blocks section.
- On the play sound meow until done block, click on the drop-down menu. Select Dog1 sound.
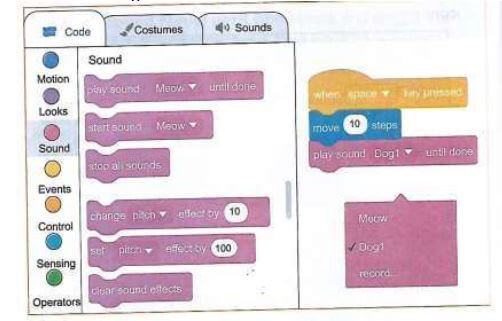
- Press the space key. Watch the cat walking and barking.
- Save your project. Click file. Next, click save to your computer. You will see the save window where you enter a file name.
Join our whatsapp group for latest updates
Tap Here to Download for 30/-
Get on WhatsApp for 30/-
Download Coding - Grade 5 Science and Technology Revision Notes.
Tap Here to Download for 30/-
Get on WhatsApp for 30/-
Why download?
- ✔ To read offline at any time.
- ✔ To Print at your convenience
- ✔ Share Easily with Friends / Students