

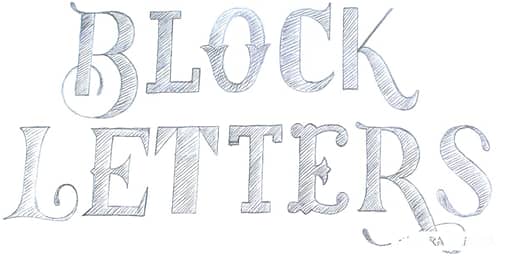
Letter Construction
- Graphic design is the art of combining words and pictures to pass a message.
- Roman letters are letters based on the Roman alphabet. E.g. A B C D E F G H
- Block letters refers to straight letters constructed individually, with no letters joining.
- 3 Dimensional - this is having length, height and depth. Raised from the surface.
Construction Of 3 Dimensional Letters
- Draw guidelines in the drawing book using a ruler and a pencil
- Write the alphabetical letters using a pencil.
- Draw an outline around using freehand or a ruler. Rub the inner lines after drawing the outline. These will now be two dimensional letters.
- Draw small projected lines to represent the shadows as they would appear. They can choose to use freehand or a ruler.
- Connect the ends of the projected lines using freehand or with a ruler. Practice constructing simple words like Baraka, Pendo, Amani, NEEMA
Decorating 3 Dimensional roman letters
- Decide on the decoration method to use.
- Prepare or acquire the tools and materials
- Decorate the face of the letters
- Decorate the shadow
- Finish by erasing any unwanted pencil marks
Book Craft
Book jacket - is a removable cover made of paper used to protect the cover of a book A book jacket contains the following:
- Illustration - which is a picture showing what the book is about.
- Author - this is the writer of the book
- Title of the book.
Measuring and cutting the book jacket
- Place the book on the manila paper to get the right measurement.
- Draw the measurement on the book jacket on the hard paper then trim off the excess paper. Mark the flaps, front , spine and back
- Write the title of the book and author’s name on the front cover using block letters.
- Fold out the two flaps and the spine as shown below.
Making the applique and attaching to the book cover
- Applique - decorative designs in which pieces of fabric are sewn or stuck on to a large piece of fabric to form a picture or pattern.
- The following are the steps to decorate the book jacket with applique
- Make a sketch design that goes with the title and then draw their desired shape on a hard paper.
- Cut out the shape and place it on a fabric of their choice.
- Cut out the shape on the fabric
- Place the cut-out shape of fabric on larger fabric.
- Attach the cut out fabric to the larger fabric using running stitches.
- Arrange the beads on the fabric to see how they fit.
- Apply glue on the beads, then rearrange the beads on the fabric and allow them to dry.
- Use glue to attach the applique onto the book jacket and allow it to dry before folding.
Puppetry
- It is the art of making and manipulating puppets in a performance. A puppet is a toy or figure in the shape of a human or animal that is moved by a human to make them appear like they are alive.
- There are several types of puppet. They include:
- Glove puppets
- Stick and rod puppets
- Marionettes
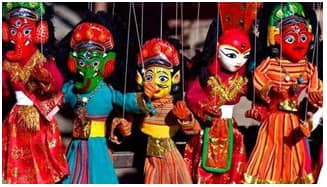
Marionettes
- A marionette is a toy of a person or animal, controlled from above by strings attached to its movable body parts.
- Marionettes are used as characters in performances in entertainment. The person manipulating a marionette is known as a marionettist. They may be hidden or seen by the audience.
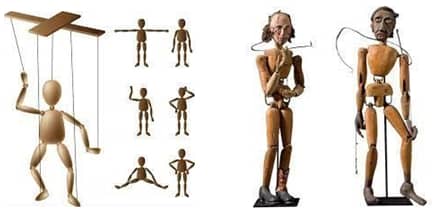
- A marionette has 3 parts
- Model - thi is the main puppet that may be of human or animal figure with movable body parts.
- Handle - this is the part the puppeteer uses to control the marionette. The most common one is a horizontal bar with others attached to it at right angle it is connected to the marionette using strings.
- Strings - these are attached from the handle to different body parts of the marionette. They are used to control the movement of the body parts during a performance.
- A marionette can be made from different materials ranging from wood, cloth, paper and even clay. The main techniques of making a marionette are construction and assemblage.
Making a marionette
- Draw and colour the full figure of the puppet on paper as they would want it to look like.
- Collect pieces of timber for each part of the body, two arms, two legs, the main body section and the head. The pieces should look very close to the parts of the body to minimize carving.
- Measure each piece of timber according to the body part it will form.
- Cut and carve using a knife or adze the piece of timber to look like the parts of the body. Follow the steps they used while carving the cooling stick or ladle in sculpture.
- Assemble the carved pieces by laying out the torso piece down first, then arrange the arms and legs on the marionette so that a section of each overlaps with the torso (the trunk or the part of the human body that doesn’t include the head, arms or leg) piece.
- Creating the joints and dressing the puppet: drill holes using nails or any sharp object and push a wire through each joint in the pupper as shown. The joints should remain loose and flexible enough for the limbs to move easily.
- Dressing the puppet. Sew simple clothing, dress the puppet and attach other details such as the hair using sound materials and objects such as buttons or seed to fix eyes.
- Creating the handle or control bar - lay down two sticks or pencils to form a cross. Tie the sticks together where they intersect using strong strings.
- Attaching the strings - thread a needle with a string (fishing line is best because it is transparent). Know and cut the string after making each attachment. The length of the string extending from each section needs to be long enough to reach the sticks.
- Connecting the strings - knot the fishing line extending from the puppet’s shoulders to the centre of the cross. Knot each of the four strings connected to the puppet’s limbs to an individual arm of the cross.
- Perform for a friend to test the marionette by manipulating the control bars at intervals.
Photography
- Photography is the art of taking pictures with a camera. Cameras range from digital camera and mobile phone camera.
- In photography certain elements needs to be taken into consideration. They include:
Focus
which includes: background, image quality, center of interest viewpoint, 3 views perspective lightning.
Focus is very important in photography. A focused image is sharp and clear. It involves adjusting the camera lens and the distance from the subject, that is the object being photographed. In digital cameras this can be done automatically

Background
refers to what is behind the main subject being photographed.
Choose a background that will make the subject stand out
tell where the background is standing out Image quality - refers to the sharpness and the brightness of a photograph.
Make sure your photograph is well focused, hold your camera firmly to avoid shaking. Take time until the image looks clear on the screen.

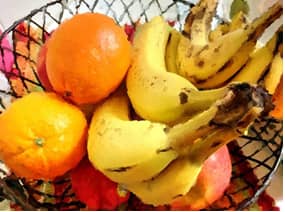
Centre of interest - is the most outstanding part or object in a photograph.
Choose one center of interest where possible. This should be the main subject in the picture.
No centre of interest

Clear Centre of interest
Viewpoint - in photography or point of view is the position of the camera in relation to that of the subject being photographed.
There are three most common points of seeing objects. These are
When the camera is at the same level with what is being photographed. This is called Eye level.
When the camera is above what is being photographed. This is called Bird’s eye view.
The camera can be below what is being photographed and that is called Worm’s eye view.
Lighting - lighting is important in photography as you cannot see without light.
One should consider the following when taking your photographs.
- Avoid bright light behind your subject
- Avoid very dark shadows
- Where possible avoid taking photographs when the sun is very bright like at noon. Mornings and evenings have better light for taking photography.
- Framing (placement of forms within the frame)
Framing is the placement of forms within the photograph.
- Choose the object to include in the picture carefully making sure the subject is clearly seen and well placed within the frame.
- The main subject of the photograph should be the center of interest.
- Avoid having too many objects in the photograph.
- composition
This refers to making something by arranging several things to form a whole. The composition of your photograph is done by combining different things to make the whole photograph.
These includes the lines, shapes and object such as people or animals
Download Design Mixed Media and Technology Graphic Design - CBC Grade 5 Art and Craft Revision Notes.
Tap Here to Download for 30/-
Get on WhatsApp for 30/-
Why download?
- ✔ To read offline at any time.
- ✔ To Print at your convenience
- ✔ Share Easily with Friends / Students